To resurface an asphalt driveway yourself, clean and pressure wash the surface, fill cracks and patch potholes, apply a tack coat, then spread one to two inches of cold mix or thick coat asphalt in thin lifts and compact each pass. Let it cure 24 to 48 hours before driving. See our resurfacing cost guide first.
What does resurfacing actually mean?
Resurfacing, also called an overlay, means laying a fresh layer of asphalt one to two inches thick over your existing driveway. It is not the same as sealcoating, which is only a thin protective coat. An overlay restores a smooth driving surface, hides minor cracking, and adds years of life without the cost of a full tear out and replace.
The key word is overlay. You are not replacing the driveway. You are putting a new wearing layer on top of the old one. That only works if the layers underneath are still doing their job. If you are unsure whether your driveway is a candidate, read our breakdown of sealcoat versus resurface versus replace and the deeper dive on resurface versus replace.
Can my driveway be resurfaced, or does it need replacing?
An overlay only works when the base and lower asphalt layers are still solid. Resurfacing a failing base just hides the problem for a year, then the new layer cracks in the same places. Walk the driveway and check honestly before you buy a single bag of mix.
- Good for resurfacing: surface cracks under a quarter inch, faded color, shallow ruts, minor potholes, and a base that does not move when you drive on it.
- Not good for resurfacing: wide alligator cracking across large areas, sections that sink or rock, deep potholes that reach the dirt, and drainage that pools water for hours.
- Borderline: a few isolated bad spots. Patch and stabilize those first, then overlay. See fixing alligator cracking and settling repair.
If you see alligator cracking over more than about 25 percent of the surface, the driveway is usually beyond repair and an overlay is a waste of money. Understanding your driveway layers helps you judge what is really failing.
What tools and materials do I need?
DIY resurfacing is a tool rental job as much as a material job. Here is the short list.
- Overlay material: cold mix asphalt in bags, or a pourable thick coat resurfacer rated for one inch or thicker. Buy 10 percent extra.
- Crack filler and cold patch: for prep, before the overlay goes down. Our guide to fixing large cracks covers products.
- Plate compactor or roller: rent a plate compactor for roughly 60 to 100 dollars a day. This is the step most DIYers skip and regret.
- Hand tools: asphalt rake or lute, flat shovel, push broom, stiff bristle broom, and a tamper for edges.
- Pressure washer and a dry forecast: you need a clean, dry surface and air temps above 50 degrees Fahrenheit for two to three days.
The 7 step DIY resurfacing process
Work in cooler morning hours on a stretch of dry, warm days. Asphalt placement and compaction guidance from the National Asphalt Pavement Association stresses clean bonding surfaces and proper compaction, and the same principles scale down to a driveway.
- Step 1. Inspect and confirm. Walk the driveway, mark damage, and confirm the base is sound. If it fails the checks above, stop and call a contractor.
- Step 2. Clean the surface. Sweep, then pressure wash off dirt, oil, and grime. Pull weeds from cracks and treat oil spots so the overlay bonds. See how to clean a driveway.
- Step 3. Fill cracks and patch holes. Use crack filler on lines wider than a quarter inch and cold patch on potholes. Let everything cure per the label. Our pothole patching guide walks through it.
- Step 4. Apply a tack coat. Spread a bonding or tack coat so the new asphalt grips the old surface. Skipping this causes the overlay to peel.
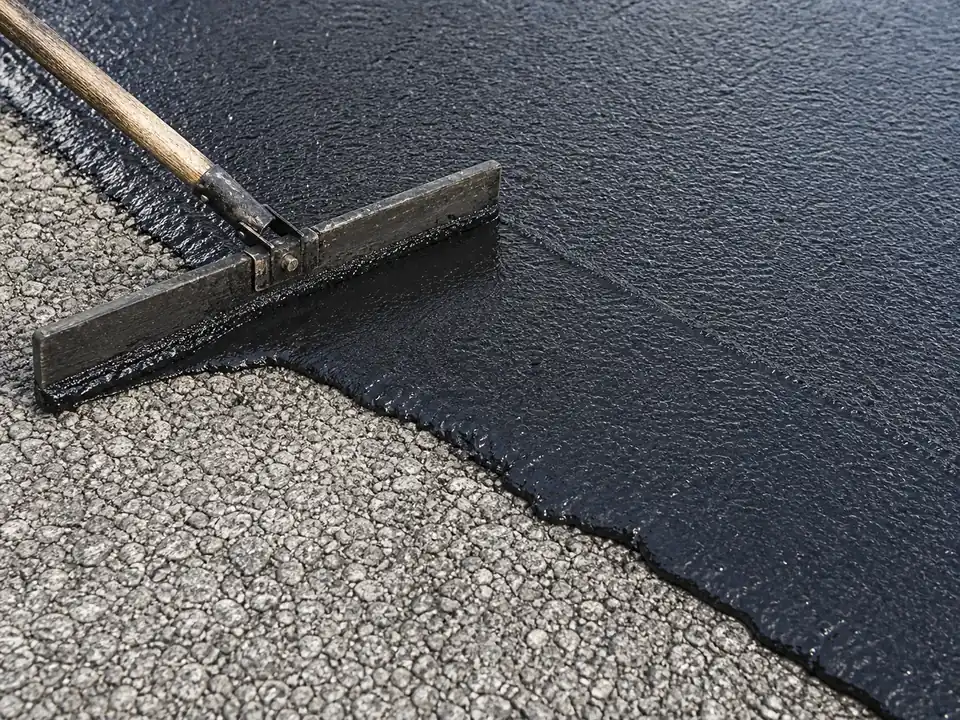
- Step 5. Spread the material. Pour and rake the mix in thin, even lifts. Work from one end to the other and keep the edges feathered so they do not lip up.
- Step 6. Compact each lift. Run the plate compactor or roller over every pass. Compaction is what turns loose mix into a hard, durable surface that handles traffic.
- Step 7. Cure and protect. Keep all traffic off for 24 to 48 hours. After the cure window, plan to sealcoat the driveway for long term protection.
That is the full cycle. The biggest mistakes are rushing the cleaning, skipping the tack coat, and not compacting. Get those three right and a DIY overlay can look and perform close to a pro job.
A few field tips make the difference. Keep your lifts thin, around half an inch to one inch of loose mix per pass, because thick layers do not compact evenly and trap soft spots that rut later. Work the material while it is warm and workable, and never let one section sit and skin over before you blend the next pass into it, or you will see a visible seam. Tape off the garage apron and any concrete edges so you get a clean line, and feather the driveway edges down rather than leaving a hard lip that a snow plow or tire can catch. Finally, do not overwork the surface with the rake. A few even passes give a tighter, more uniform finish than constant back and forth, which pulls the larger aggregate to the top and leaves a rough, open texture.
Estimator
DIY Resurfacing Cost Estimator
Enter your driveway size to see a rough DIY material range versus a typical contractor overlay. Numbers are estimates, not quotes.
Contractor range assumes 3 to 7 dollars per square foot installed. DIY excludes tool rental of roughly 60 to 100 dollars per day.
How much does DIY resurfacing cost?
DIY overlay materials run about 1 to 3 dollars per square foot. A 600 square foot driveway lands around 600 to 1,800 dollars in product, plus tool rental. A contractor overlay usually runs 3 to 7 dollars per square foot, so the labor is where you save. For full numbers, our resurfacing cost guide and the driveway cost calculator give you tighter ranges by size and region.
Be realistic about your time. A DIY overlay is a full weekend with one or two helpers, and the result depends on how careful you are. If your time is tight or the driveway is large, paying for an overlay can be the better value.
How long does a DIY overlay last?
A well done overlay on a sound base lasts 8 to 15 years before it needs major work again, similar to how long a fresh asphalt driveway lasts overall. The Federal Highway Administration ties pavement life to drainage and maintenance, and the same holds at home. Sealcoat every two to three years, keep water moving off the surface, and fix small cracks fast. See our maintenance schedule and driveway lifespan guide to protect the work.
Safety and timing notes
Hot and cold mix asphalt give off fumes and can irritate skin and eyes. Work in a ventilated open area, wear gloves and eye protection, and follow product safety data sheets. General handling guidance from NIOSH at the CDC covers asphalt exposure. Pick your window with care too. Cool, damp days slow curing and ruin bonding, so check our take on the best time to pave before you start.
Bottom line
DIY resurfacing is realistic for a small to mid size driveway with a sound base and only surface level damage. Clean it well, patch and crack fill first, use a tack coat, spread in thin lifts, and compact every pass. Budget a full weekend, rent the right tools, and let it cure before driving. If the base is failing or cracking is widespread, skip the overlay and price a replacement instead.