Asphalt driveway base preparation means building a stable foundation under the pavement: strip topsoil, grade the native subgrade to a 1.5 to 2 percent slope, compact it, then place and compact 4 to 8 inches of dense graded crushed aggregate in 2 to 4 inch lifts. A proof roll confirms it is ready before paving. See how it stacks up in our driveway layers guide.
Why the base matters more than the asphalt
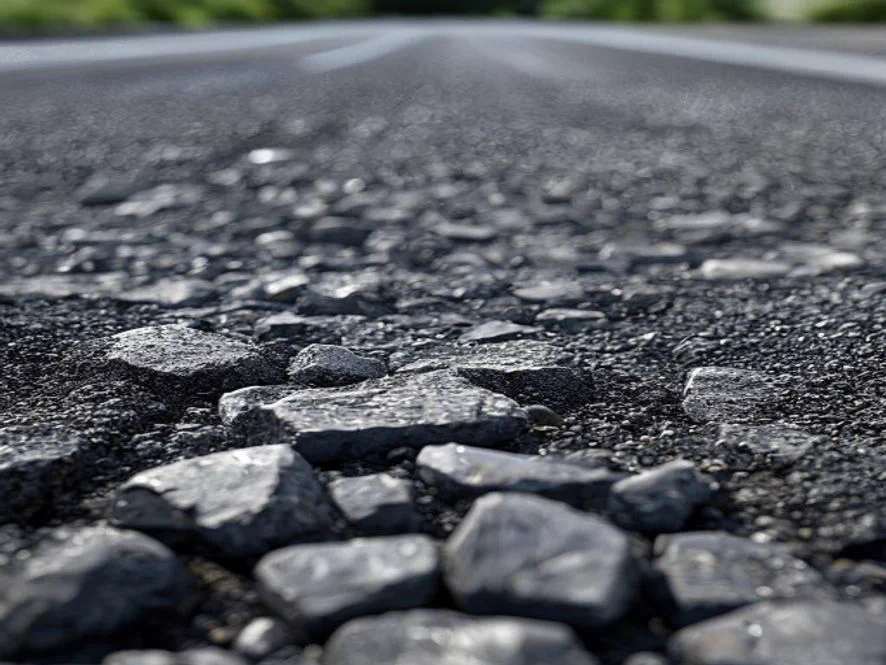
The asphalt surface you see is the thinnest part of the structure. It is a wearing layer. The real load carrying happens in the compacted aggregate base and the native subgrade below it. When a driveway settles, ruts, alligator cracks, or forms low spots that pond water, the cause is almost always the base, not the asphalt mix. You can lay perfect hot mix over a bad base and still watch it fail in a few winters. That is why a skipped or rushed base is the number one item on every list of bad install problems.
Think of it as three jobs stacked together. The subgrade is the ground. The aggregate base spreads concentrated wheel loads over a wide area so the soil never sees more than it can take. The asphalt seals the top and sheds water. Each layer depends on the one beneath being solid and dry. Get the order right and a 600 to 1,200 square foot driveway can carry daily traffic for 20 to 30 years with only routine sealing and crack filling.
Step 1: Clear and excavate
Strip off topsoil, sod, roots, and any soft organic material. Organics rot and compress, so none of it can stay under the driveway. The crew then excavates to a total depth equal to the planned asphalt thickness plus the base thickness. For a typical residential driveway that is roughly 8 to 14 inches below the finished surface. If you are unsure how thick the asphalt itself should be, our thickness guide sets the residential numbers.
Step 2: Grade and compact the subgrade
The exposed native soil is shaped to the same slope the finished driveway will have, at least 1.5 to 2 percent (about a quarter inch of fall per foot) so water runs off instead of pooling. Then it is compacted with a roller or plate compactor until it stops deflecting. Soft, springy, or wet subgrade is dug out and replaced. The Federal Highway Administration treats subgrade preparation as the foundation of pavement performance for exactly this reason: everything above it inherits its weaknesses.
- Sandy, gravelly soil: Drains well and compacts easily. A thinner base often works.
- Clay soil: Holds water, swells, and heaves in frost. Needs a thicker base and often a separation fabric.
- Organic or fill soil: Unpredictable. May need undercutting and replacement with engineered fill.
Step 3: Add geotextile fabric over weak soil
Over clay or soft ground, a woven geotextile separation fabric is rolled across the subgrade before any stone goes down. It stops the aggregate from punching down and mixing into the mud over time, which is how a 6 inch base quietly becomes a 3 inch base after a few wet seasons. Fabric is cheap insurance on questionable soil and is one of the line items worth paying for rather than cutting.
Step 4: Place the aggregate base in lifts
The structural base is dense graded crushed stone, sold as crusher run, road base, 21A, or 21B depending on region. It blends angular rock from about three quarter inch down to stone dust, so it knits together hard when compacted. Avoid round pea gravel for the structural layer because it rolls and never locks up. If you already have a stone drive and are weighing paving asphalt over a gravel driveway, the same gradation and compaction rules decide whether that existing surface can serve as the base.
The crew spreads it in 2 to 4 inch lifts. Each lift is lightly watered to the right moisture and compacted before the next goes on. Trying to compact a single thick layer leaves the bottom loose. Total compacted depth runs 4 to 8 inches for most homes, more under heavy loads. If your driveway will hold a motorhome or trailer, read our RV and heavy vehicle thickness guide for the deeper spec.
Base depth and stone estimator
Pick your soil and use, then enter driveway size. This gives a recommended compacted base depth and a rough crushed stone tonnage. Always confirm with your contractor and local code.
Step 5: Final grade the base
Once the stone is at full depth and compacted, the top is trimmed to the finished slope and crown. The base should mirror the planned asphalt surface so water runs to the edges and off the driveway, never toward the garage or a low corner. Getting the slope right here is what prevents the standing water and drainage headaches covered in our drainage solutions guide. A laser level or string line keeps the grade honest across the whole pad.
Step 6: Proof roll and fix soft spots
The final check is a proof roll. A loaded dump truck is driven slowly across the finished base while someone watches. Any spot that ruts, flexes, or pumps water up through the stone is marked, dug out, and rebuilt. This is the test that separates a base that is merely flat from a base that is actually ready. Skipping it is gambling. Only after the proof roll passes does the asphalt go down. On a small residential job a crew can finish clearing, grading, and base work in one day, then pave the next, so the base prep is roughly half the total schedule even though it is the part you never see again.
- No rutting: Truck tires should leave faint marks at most, never deep tracks.
- No flexing: The surface should not visibly move or wave ahead of the tire.
- No pumping: Water or mud welling up means trapped moisture and a weak spot.
Drainage is part of the base
Water is the enemy of every driveway. A correct base sheds surface water with slope and keeps groundwater from saturating the subgrade. On flat lots or at the bottom of a grade, the base plan may include a perimeter or under drain. Our french drain guide covers when one is worth adding. Trapped water freezes, expands, and lifts the pavement, which is the freeze thaw cycle behind so much winter cracking. Compaction and proper aggregate gradation are core to long term performance in the design guidance from the National Asphalt Pavement Association, which treats a strong, well drained base as the foundation of pavement life.
How to tell a contractor is doing it right
You usually cannot inspect a finished base after paving, so watch the work or ask pointed questions. Good crews talk about lift thickness, compaction, slope, and proof rolling without being prompted. Vague answers are a red flag. Use our contractor questions checklist and run the written scope through the quote checker to make sure base prep is actually itemized and not buried in a single lump line.
Bottom line
The base is the driveway. Strip the organics, grade and compact the subgrade, add fabric over weak soil, build the aggregate in thin compacted lifts to 4 to 8 inches, final grade to slope, and prove it with a loaded truck before any asphalt is placed. Spend the effort and money here and the surface above it can last two to three decades. Cut corners on the base and no asphalt mix will save it. Detailed references and standards are on the sources page.