Not all asphalt cracks are the same job. Treating a hairline crack with the same product as alligator cracking guarantees both fail. This guide sorts cracks by type and matches each one to the right repair, in plain DIY-or-not terms. If your driveway has wider issues, jump to how long does an asphalt driveway last for the full warning-sign list. Most new cracks open over the winter, so the cheapest fix is prevention; see our winter care guide for what to do before the first hard freeze.
Hairline cracks (under 1/4 inch wide)
Most common, easiest to fix. These are surface aging cracks, freeze-thaw stress, or shrinkage. They do not yet point to structural failure.
- Material: Pourable or bottle-grade asphalt crack filler. About 5 to 12 dollars per bottle.
- Process: Clean the crack with a wire brush or blower. Remove weeds and loose debris. Pour filler into the crack until flush with the surface. Smooth with a putty knife or the bottle's applicator.
- Cure time: 24 to 48 hours before walking. Longer before sealcoat.
- Limit: Hairline filler will re-crack at the same line within a year or two if movement continues underneath. Re-fill annually as needed.
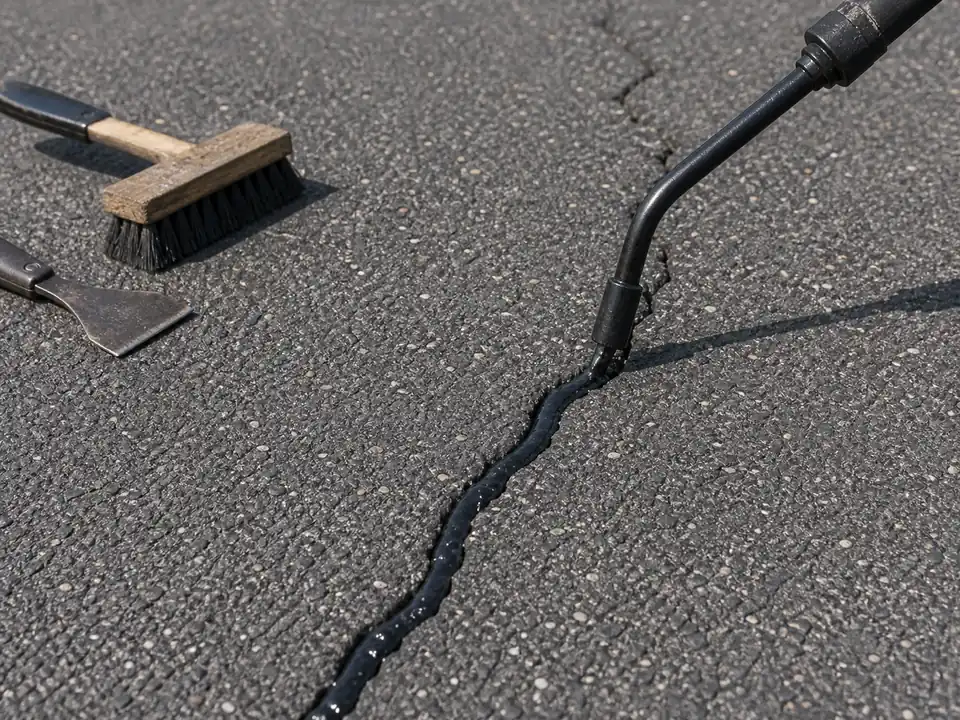
Transverse and longitudinal cracks (1/4 to 1/2 inch wide)
Linear cracks running across or along the driveway, wider than hairline. These often follow joints, edges, or stress points.
- Material: Rubberized asphalt crack filler or sealant. Sometimes hot-pour for the best result, applied with a torch-melt rope or an applicator wand.
- Process: Clean and dry the crack. Apply a backing rod for very wide cracks. Apply filler. Smooth.
- Cure time: 24 to 72 hours.
- Limit: If the crack is over half an inch and still growing, you are filling a symptom. The base is moving and surface filler will keep cracking.
Wide cracks and small potholes
Cracks wider than half an inch, or actual holes punched through the asphalt. The repair is a small patch, not just filler. This is the same work covered in our DIY asphalt driveway guide.
- Material: Cold patch (bagged) for DIY. Hot mix only for crews with a paver and roller.
- Process: Square the edges of the failure with a saw or chisel if you can. Clean out loose material. Fill in 1 to 2 inch lifts. Compact each lift with a hand tamper, plate compactor, or vehicle tire.
- Cure time: Cold patch is drivable right away. Full cure takes weeks. Avoid sharp turning over the patch for the first few days.
- Limit: A pothole is usually a sign of base failure. If the same hole keeps reopening, the base under it needs repair, not more cold patch.
Alligator cracking (a different problem)
Interconnected cracks that look like reptile skin or chicken wire. This is base failure showing through the surface, not a surface defect. The Asphalt Institute classifies this as a fatigue-cracking pattern that points to weak structure underneath.
Alligator cracking cannot be DIY-patched in any meaningful way. Cold patch on top is cosmetic. The real fix is cut-out repair: saw the failed section out, dig down, replace the failed base, then re-pave with hot mix. This is paver-and-roller work.
If alligator cracking covers a meaningful portion of the driveway, the conversation shifts from "patch" to overlay or tear-out and replace.
The right order: clean, fill, cure, seal
The biggest mistake homeowners make on crack repair is doing the steps in the wrong order, especially with sealcoating. The right sequence:
- Inspect the surface. Identify the type of cracking.
- Clean each crack. Wire brush, blower, or both.
- Fill with the right product for the width and movement.
- Wait for full cure per the product label.
- Sealcoat the surface, if it is due. Use the when to sealcoat timing rule and the sealer calculator to plan gallons.
Sealing first and trying to fix cracks through the sealcoat does not work. The sealer cracks at the same lines and the filler does not bond cleanly.
Common crack-repair mistakes
- Filling a wet crack. Filler does not bond to damp asphalt. Wait at least 24 hours after rain.
- Skipping the clean step. Dust, weeds, and loose grit kill the bond. A 5 minute wire-brush pass doubles the lifetime of the fill. If the crack has live rooted weeds, pull them first; surface filler over a live root fails fast. See our weeds in driveway cracks guide.
- Overfilling and leaving a hump. Crack filler should sit flush with the surface, not stand proud. Hump fills get sheared off by tires.
- Filling alligator cracking with surface product. See above. It will fail every time.
- Cleaning with petroleum solvents. They soften the binder. Use water, brush, and air. The oil stain guide covers the right cleaning chemistry. The FHWA pavement program publishes distress-identification guides used by state DOTs that are useful background if you want to see how engineers grade these same patterns.
When patching is not enough
Three signs say it is time to stop patching and plan a bigger fix. Recurring potholes in the same spot. Alligator cracking on more than a few square feet. Standing water that pools after rain. At that point, weigh overlay vs tear-out, get a planning number from the cost calculator, and read our sources page for the references behind the figures.